Page
Facilitation Techniques that Work Well in OBE
Completion requirements
View
As facilitator you can achieve these objectives by applying the following techniques:
General Introduction of Learners
The first aim of the introduction is, of course, to become acquainted with each other and to learn about professional backgrounds. The second aim is to “warm-up” the learners and to introduce them to the participatory working style. Different media can be used to show the range of participatory methodology. Introductions are of central importance. They lay the groundwork for the inter-personal and emotional relationships between the learners and between the learners and the facilitators. An open, pleasant, social atmosphere will improve the working productivity.
Introductions can also allow the learners to voice first (personal) ideas about the workshop topic. Ask them to write an idea, or a thought about why they’re here (“My most special experience in the project so far…”) on a card and include the card in the introduction. You will have also produced a first result. Everyone sees himself pinned on the chart and the group has a basis to discuss its general feelings on the subject.
Introductions help facilitators to learn about the learners and their needs. They can be combined with the question “What are your expectations in regard to this workshop?”
Introduction sessions can take longer in larger groups. You should avoid merely asking one participant after the next to say who he is and where he’s from. Use stimulating media such as pictures to fish out more information about the person.
Personal introductions become lengthy and tiresome when groups are larger than 30 people. Use the whole room at hand to get them to stand up, get to know new people and discuss different topics at three to four “stations” in the room.
Click here to view a video that explains how to introduce yourself as a facilitator.
Click here to view a video that explains the five ways to introduce group participants.
Example for Introductions in Larger Groups
A group of 100 learners from all over the country met to work for one and a half days. The topic was Sustainable Development in Germany. On arriving at the venue each participant was photo-graphed by a professional photographer. Each photo was immediately digitally inserted into a pre-prepared form and printed out in the office during the opening/welcome which took place in the hall. The 100 pieces of paper with the printed photos were quietly laid on the floor at the back of the hall so that the facilitator could produce a sense of surprise when he asked everyone to stand up and find his or her photo. The learners filled out the rest of the form and met in smaller groups according to the colour on their form. They pinned their forms on the board and introduced themselves in standing groups. Each “colour-group” had its own facilitator. The introduction concluded with a series of interviews per microphone with each group, in which the facilitator asked various learners to sum up the expectations and reflect on the sort of people they had just got acquainted with for all to hear. The photos remained visible in the hall during the entire workshop so that the learners and facilitators could check up on names and backgrounds at will.
"Transfer-In"
It makes sense to start the workshop or seminar with a method in which each participant can present himself and his connection to or feelings towards the content/theme of the process. This method is not simply an ice-breaker but allows an initial grasping of the theme from the individual viewpoint of each participant. This enables each participant to compare his own viewpoint with that of the others in the group.
Standard introductory rounds, which force the learners to present themselves solely with reference to:
- name,
- societal/employment position, and
- expectations should be avoided through introducing a reference to the theme and getting rid of the notion of “expectations”.
This will help to create an open, hierarchy-free atmosphere, in which the theme becomes the centre of attention as opposed to single, dominant learners.
Click here to view an explanation about "transfer-in".
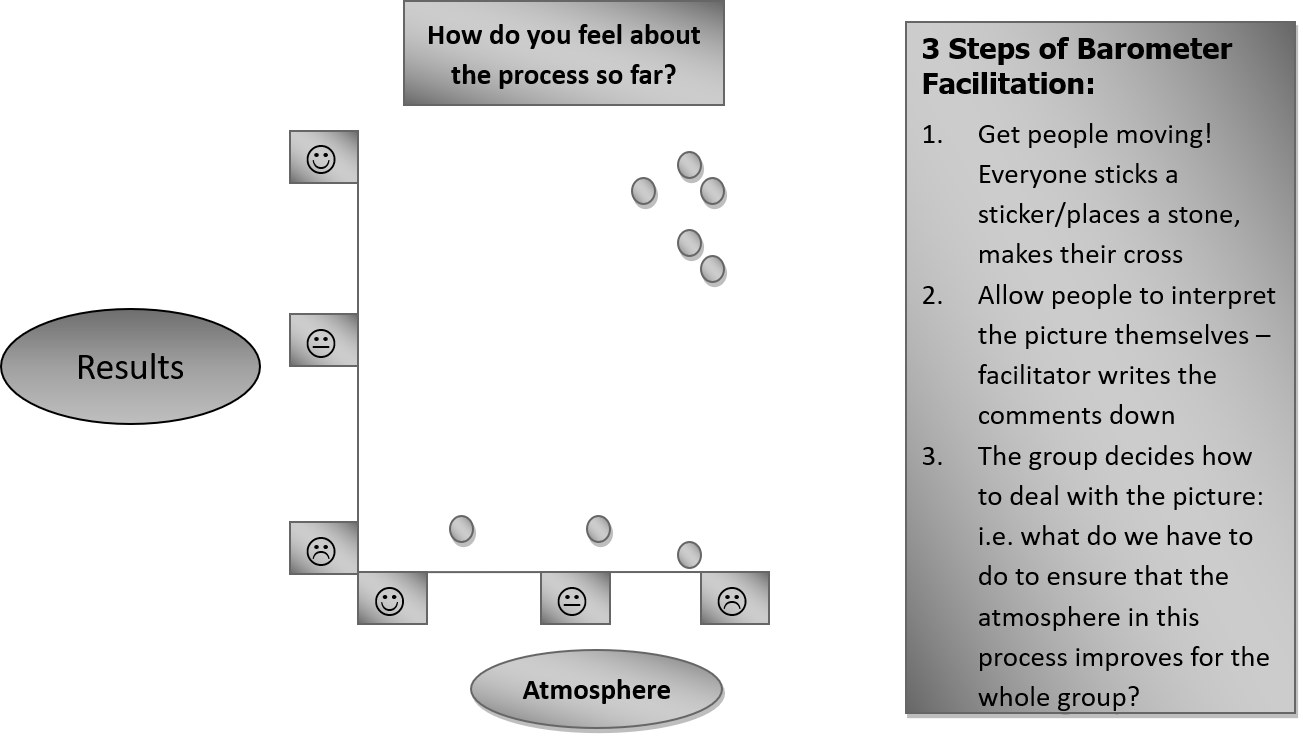
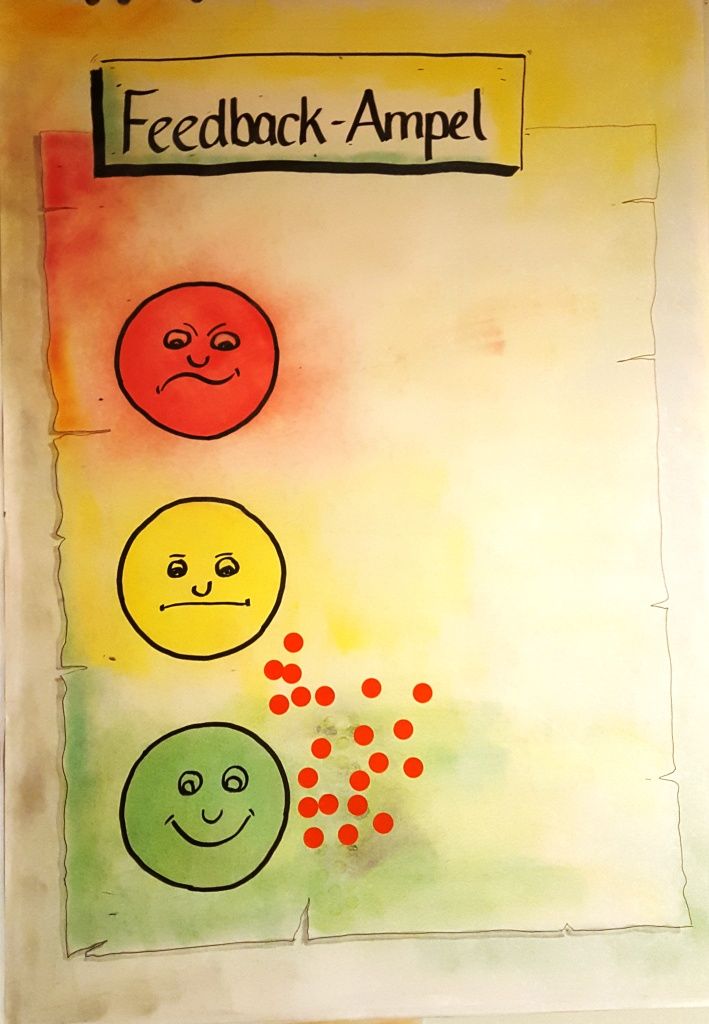
Barometer
This method is flexible and can also be used as a transfer-in to gain a quick feedback on either one aspect or on a two-dimensional question.
Use of Symbolic Objects
Place a collection of natural objects (i.e. leaves, stones, twigs) in the centre of the room. Ask the learners to select an object, look at it in silence and then to write down what the object “tells them” about the theme/part of the theme of the workshop. The learners then relate their ideas and thoughts to a partner before each participant reports back to the group on their respective partner’s thoughts.
Click here to view an explanation about the use of symbolic objects and pictures.
Use of Pictures
Place a collection of pictures, photographs, postcards or cartoons (i.e. from magazines) on the floor. Ask the learners to get up and look at the pictures and select one or two which help them express their thoughts on the theme or their feelings at being there. The learners then use the pictures to share their names, ideas and thoughts with the group in turn. It is important not to rush the learners here, as they will need time to express themselves with the pictures.
Hopes and Fears
Why not “expectations”? When learners are asked to formulate their “expectations” for the workshop or meeting they are also formulating demands on the facilitator and, consequently, reducing their sense of responsibility for the outcomes. We therefore suggest using the terms “hopes and fears”, thus still allowing learners to voice their views on what “should” or “should not” happen at the workshop, whilst not suggesting that the facilitator has some service or duty to deliver. In using the term “fears”, the learners are encouraged from the beginning to express their emotional as well as their factual-logical ideas.
The learners are divided into small groups (3-5 persons) and asked to briefly discuss and then capture their hopes and fears for the workshop on a flipchart. The flipcharts are then hung on the wall next to each other, presented first visually as wallpaper for all to see before the major points of each group’s results being read out aloud. The flipcharts can remain hanging on the wall during the workshop. The facilitator refers to the hopes and fears in presenting the goals and programme of the workshop. However, no hopes and fears should be dismissed. Scepticism is a healthy form of group control. Let them make their own experience and have time to change their fears into relief and positive surprise. Won-over sceptics are a facilitator’s most powerful and loyal ally.