Page
Plant Health
Completion requirements
View
Nutrient Analyses
Soil is made up of minerals. The colour, structure and texture of specific soil are determined by the minerals that it contains.
All plants need the following to grow and produce food, and to successfully complete their lifecycles:
- Sunlight
- Water
- Oxygen
- Carbon dioxide
- Nutrients (food), are also called mineral nutrient elements or essential nutrient elements.
Different plants require different quantities of specific nutrients. Plants source nutrients from the soil and irrigation water. The nutrients that are not supplied naturally are supplied as fertilisers.
If the soil that a plant grows in is managed well, the plant will grow well and produce optimally. To manage soil, we need to know:
- What nutrients the crop requires and in what quantities;
- The characteristics of the soil that will allow this plant to take up water and air optimally;
- The soil type will allow the plant to anchor and grow optimally.
Once we know what the ideal soil is for the crop, we also need to determine what we could do to optimise the soil we have available.
Nutrient Analyses
Click here to view and download a handout that contains the information below about Nutrient Analysis.
Nutrient deficiencies develop because certain physiological processes cannot be completed without a certain minimum supply of the specific nutrients. This results in a reasonably specific and identifiable symptom for each element.
Once the symptoms of a possible nutrient deficiency have been observed, the deficiency must be confirmed through leaf- or soil analysis. Not all abnormalities observed are necessarily due to nutrient deficiency. Pests and diseases may cause symptoms similar to those of nutrient deficits.
While it is important to have a good understanding of nutrient deficiency symptoms, it cannot be used in developing a fertilisation program. By the time nutrient deficiency symptoms appear, the deficiency has already impacted the growth and production of the crop. It is essential to have a proactive approach to plant nutrition.
In order to take necessary interventions, we need to diagnose the nutritional status of the crop. This is especially true for perennial crops. Leaf and soil analysis are diagnostic tools that are used to monitor the nutritional status of the crop. Crop information is added to the data gathered from the analyses, and a refined diagnostics system is developed in this manner.
In order for an analysis to be conducted, representative samples must be collected and processed;
The first principle of any sampling action is that the sample must be representative of the bulk of the medium that is being sampled. A sample should not be viewed as a section of the whole, but rather the whole reduced to a manageable volume.
It is important that all sampling equipment, including cups, spatulas, buckets, and mixing equipment, must be thoroughly cleaned before sampling. This will avoid contamination of samples.
Sampling Procedures
Leaves, In the case of tree crops soil and leaf samples are taken at and from the same set of trees every year. This is to comply with the first principle of sampling and to minimise the effects of other factors on the nutritional status of the trees. Two to four rows that represent the orchard in all respects are selected for sampling and are referred to as the index blocks or rows. The rows are marked, and samples for that orchard are always taken from those trees.
Leaf Sampling Procedure
Click here to view a video that explains leaf sampling.
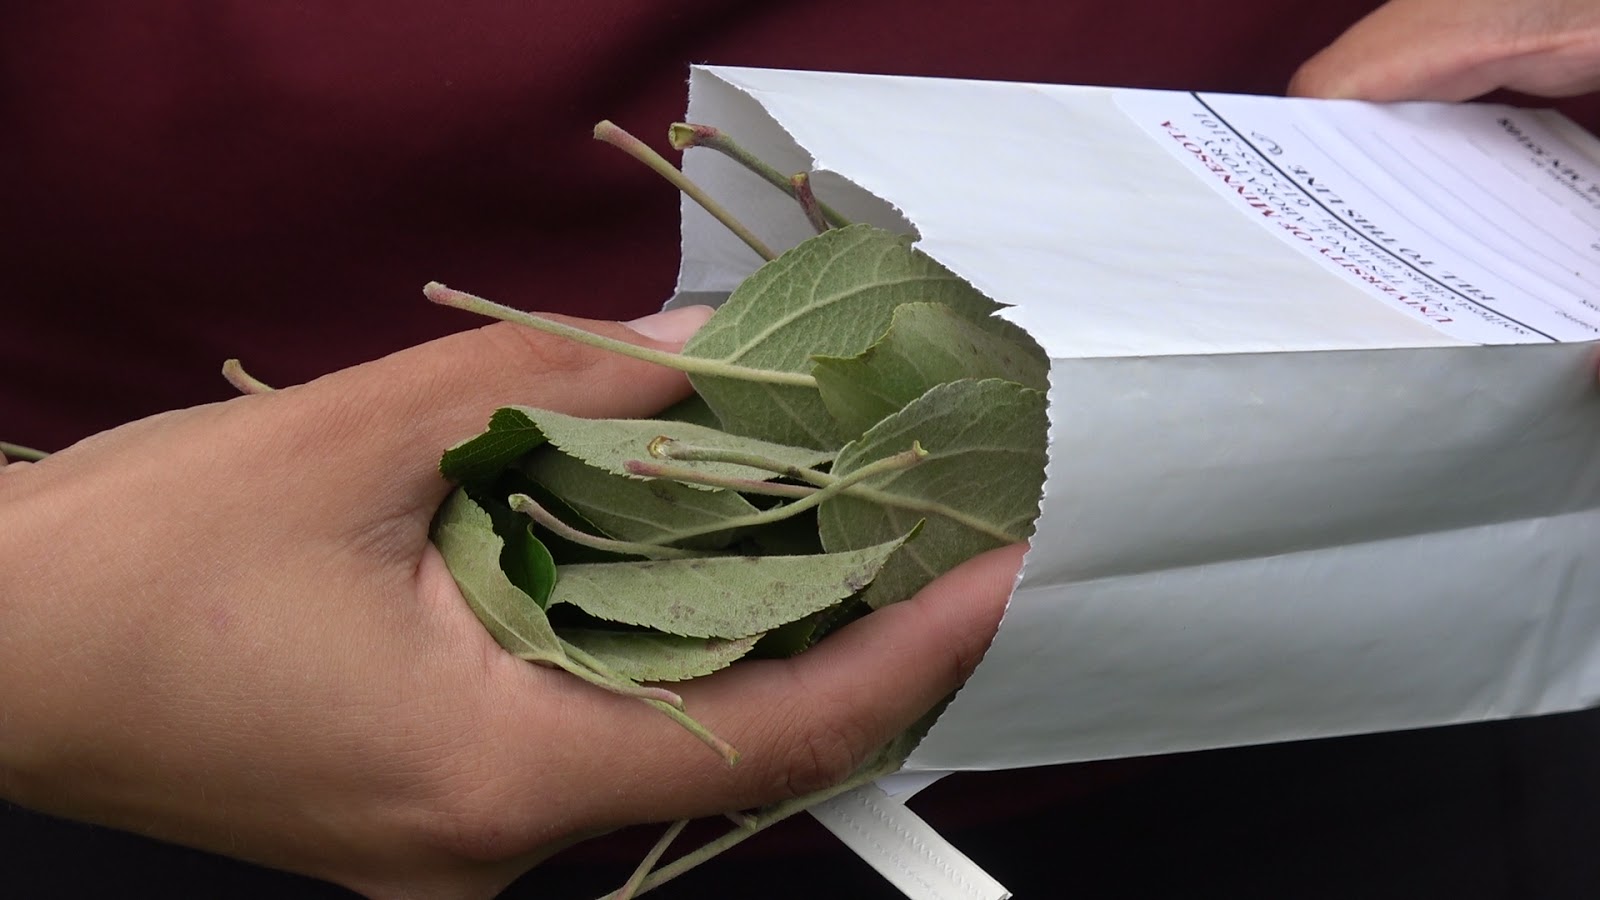
Leaf sampling must be done at the appropriate time of the season. In the case of citrus orchards sampling occurs between February and May. A sampling of a specific orchard – or the whole farm – should be done at the same time every year, for instance, the second week of March. Leaves are picked from behind fruit and sampling should therefore be done before harvesting.
- Enter the path between two of the rows in the index block and pick leaves from every second tree on the left and right.

- Pick 50 to 100 leaves per sample.
- Pick only healthy undamaged leaves.
- Pick leaves that are between 1 and 2 metres from the orchard floor, i.e. between about the waist and head of a person of average height.
- Pick leaves from fruit-bearing twigs.
- Place the leaves in a new, clean plastics bag.
- Squeeze the air out of the bag and close it tightly.
- Label the sample as is prescribed by the laboratory that will be conducting your analysis. Never put a label inside the sample bag with leaves, as the moisture will damage your label. The ideal way of labelling is to place the sample in the plastics bag into a second bag. The label is then sandwiched between the two bags.
- Keep the samples until they are dispatched to the laboratory in the shade or in a cool area, but do not freeze the samples.
Specific sampling procedures are available for other tree and field crops and vegetables. Depending on the specific crop you are working with, the learner should get hold of these procedures and collect plant samples accordingly.
Soil Sampling Procedure
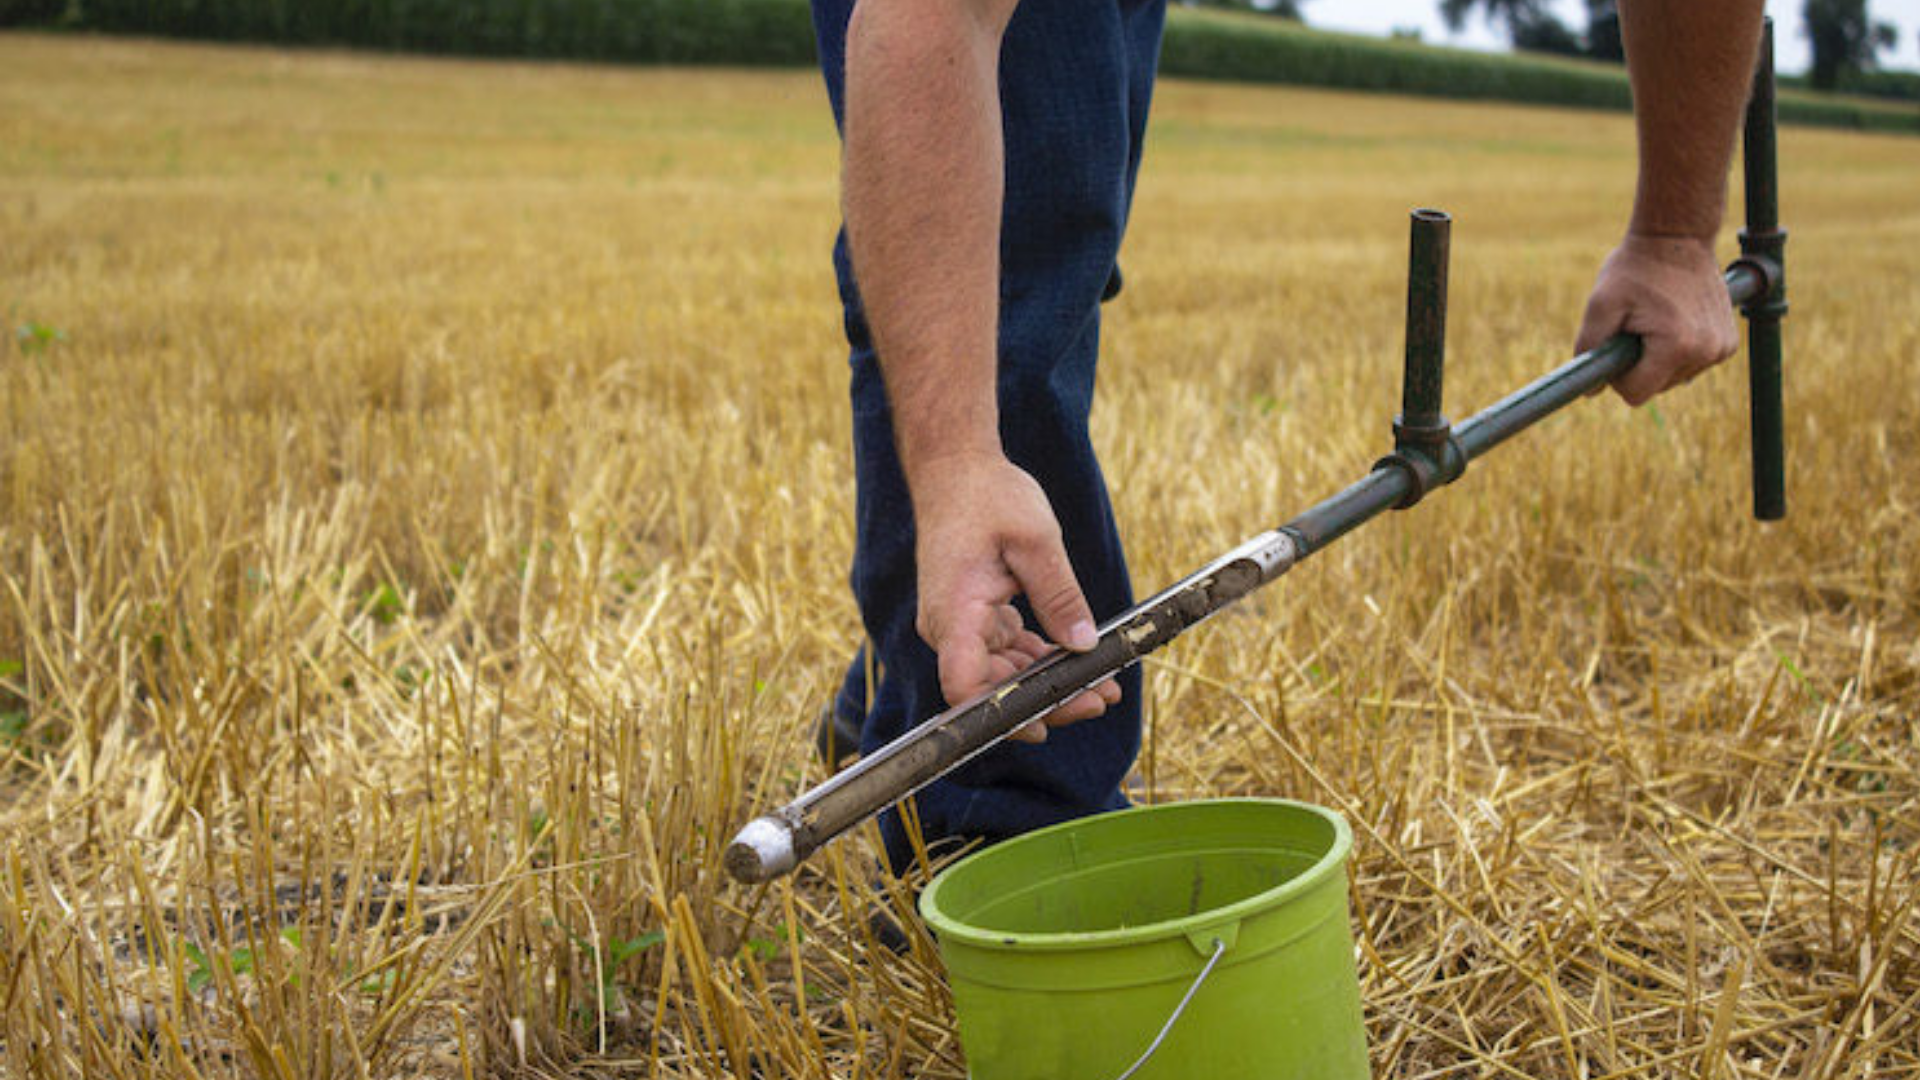
Click here to view a video that explains how to take a soil sample.
- Take soil samples from the same index block where the leaf sample was taken.
- Identify areas under every second to the fourth tree for collecting sub-samples.
- A soil sample is made up of a number of sub-samples, that are mixed together to form the sample.
- A total of between 15 and 20 sub-samples should be taken per index row.
- Remove any visible plant debris from the surface of the soil, but take care not to remove the topsoil.
- Take the sub-sample from the surface down to a depth of 30cm depth using a spade or soil auger.
- Collect all sub-samples in a plastics bucket.
- Mix the soil in the bucket and place about 500g in a plastics bag.
- Seal the bag tightly.
- Label the sample as is prescribed by the laboratory. Never put a label in the sample bag with the soil.
Sample Granular or Powdered Fertilisers
- Select at least 1% of the bags that are to be tested and take a sub-sample of 200g from each bag.
- Take the 200g to represent the top, middle and bottom of the bag.
- Put all these sub-samples in a plastics bucket and mix them thoroughly.
- Remove 500g of the mixed sample and place it into a suitable clean plastic bag.
- Seal the bag properly.
- Label the sample as is prescribed by the laboratory to be used for analyses. Never put a label in the sample bag with the fertiliser.
A spatula used for taking grain samples can also be used. In this case press the spatula into the top, middle and bottom of the bags and collect these sub-samples in a bucket.
When sampling is done for a legal dispute, the Registrar of Fertilisers prescribes specific procedures and samples must be taken in the presence of both parties to the dispute.
Sampling Liquid Fertilisers or Fertiliser Solutions
- Select at least 1% of the containers to be tested and take a sub-sample of 200ml from each container.
- Put all the sub-samples in a plastic bucket and mix it thoroughly.
- Remove and place 500ml of the mixed sample into a suitable, clean plastics bottle.
- Seal properly.
- Stick or tie a label to the bottle, as prescribed by the laboratory to be used for analyses.
Labelling Samples
Attach a label to the plastic bag or bottle, by either sticking it on or tying it securely with string.
Do not write the information directly onto the bag or bottle, as even permanent marker ink rubs off during transport.
Never place a label inside the bag with the sample.
If more than one sample is sent, at least one of the labels should contain all the details of the sender, including:
- Name
- Address
- Telephone number
- Fax number
- Contact person
- Details of the analysis are required in case of fertiliser samples and special instructions, where required.
- Order number, where used.
- Type of sample.
- Sample reference, i.e. orchard number, store number. Remember that the sample reference (name or number) must mean something to the sender. The laboratory report will contain this reference and the sender must be able to connect the results with the relevant fertiliser batch. Keep the reference simple, however. A reference such as “Orchard 27 near dam” is unnecessary, if there is only one orchard 27. The word “orchard” can even be left out in the case of leaf, soil and fruit samples, as these samples are always taken from orchards. Be consistent in the manner in which references are used, so that all farm employees that handle the samples will understand it. These simple rules make the whole process of recording, reporting and record-keeping much easier.
The labels on the remainder of the samples can reflect only the name, sample reference and type of sample.
Sample Preparation And Packaging
Keep samples of all types in a cool, dry area away from direct sunlight until ready for dispatch. Ensure that the samples are kept away from possible sources of contamination.
Before packing the samples, ensure that all the samples are labelled correctly and that the labels are legible.
Check the samples against a Samples Dispatched list as they are being packed.
Pack the samples in a sturdy box and fill the box with packing material such as bubble wrap and/or newspaper, to steady the samples.